


You will need:
- paper (I used orange and gold)
- green piper cleaners
- scissors
- glue
- pencil
- something circular to draw around (small bowl, cup etc)

Place your circular object on the paper and draw around it.

Carefully cut the circles out. I put 4 pieces of paper on top of each other, so that I got 4 cut circles from each drawn circle.

Fold each circle in half. You will need 6 or 8 circles for each pumpkin.

Glue the outside of one half of a circle and place another folded circle on top of it. Repeat with all the circles, then glue the two ends together.
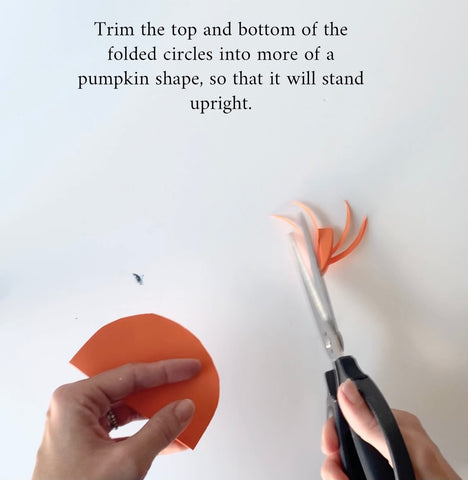
Trim the two ends of the semi circles to make more of a pumpkin shape - this also helps your pumpkin to stay standing upright!

Fold your pipe cleaner in half and twist it. Bend the end so it is slightly hooked. Then feed the pipe cleaner into the small hole where the paper circles meet, in the middle of your pumpkin.

If you're using single-sided card, make sure to fold the circles so that the coloured side is on the inside.

Voila!
Easy peasey. Please do leave a comment below or tag me on Instagram @thelittlejones if you give these little pumpkins a go!